Direct
The tools in this group allow you obtain distance, area, and angle measurements by tracing exact features in your image. For example, you can use the line tool to trace a straight line in your image, or you can use the angle tool to trace over a visible wedge in your image.
Line: This tool allows you to trace a straight line in the image. It measures the length of the line. Click and drag the mouse from the desired starting point for the line to the desired ending point for the line. Note that real time length and angle information is provided in the application status bar as you draw the line. This allows you to preview these attributes before releasing the mouse and 'cementing' the line.
![]()
Point to Point: This tool allows you to measure the distance between two points in the image. Click on the starting point and then click on the end-point.

Polyline: This tool allows you to trace irregular lines in the image. You can use this tool to trace a freeform line (a line with smooth edges) or a polyvertices line (a line made up of straight line segments). It measures the length of the line.
To trace a freeform line
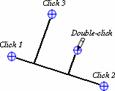
Hold the left mouse down while you draw with the cursor to trace the contours of the feature. Double-click to complete the line.
To trace a polyvertices line
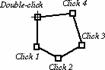
Click the left mouse button at each vertex (including the beginning point) of the feature. Double-click to complete the line.
Polygon: This tool allows you trace a polygon-shaped feature in the image. It measures the area of the polygonal feature.
To trace a freeform shape
Hold the left mouse down while you draw with the cursor to trace the contours of the feature. Double-click to complete the shape.
![]()
To trace a polyvertices shape
Click the left mouse button at each vertex (including the beginning point) of the feature. Double-click to complete the polygon.
Rectangle: This tool allows you to trace a rectangular feature in the image. It measures the area of the rectangle. Click and drag the mouse from one corner of the rectangular feature to the opposite corner.
Circle/Ellipse: These tools allow you to trace an elliptical or circular feature in the image. It measures the area of the feature. There are two ways to draw an ellipse or circle: radial drawing or box drawing.
Radial drawing: Click and drag the mouse at and away from the center of the feature.

Box drawing: Click and drag the mouse from one corner of the elliptical/circular feature to the opposite corner. ‘Corner’ refers to the corner of the bounding box around the ellipse or circle.
Perpendicular Distance: This tool allows you to determine the distance of one or more points in the image from a given reference line. Click and drag the mouse from the start-point to the end-point of the reference line. Click the mouse on each point for which you want a distance measurement.
Angle: This tool allows you to trace an angle in the image. To trace an angle you must make three clicks: Click on the end-point of one of the vectors. Click on the vertex of the angle. Click on the end-point of the other vector.

Points: This tool allows you to mark a point of interest in the image. It measures the distance of the point from the bottom and left side of the image. Position the mouse over the point of interest and click.
Brush: The brush tool enables you to add measurements to an image in a 'freehand' manner.
Select the brush tool (the cursor updates to show that the brush tool is selected), left mouse click to activate the brush and freely create measurements of any shape on the image.
The Fill Holes measurement option is honored by the Brush tool, giving you the option to either leave voids within your objects or to ensure that they are automatically filled.
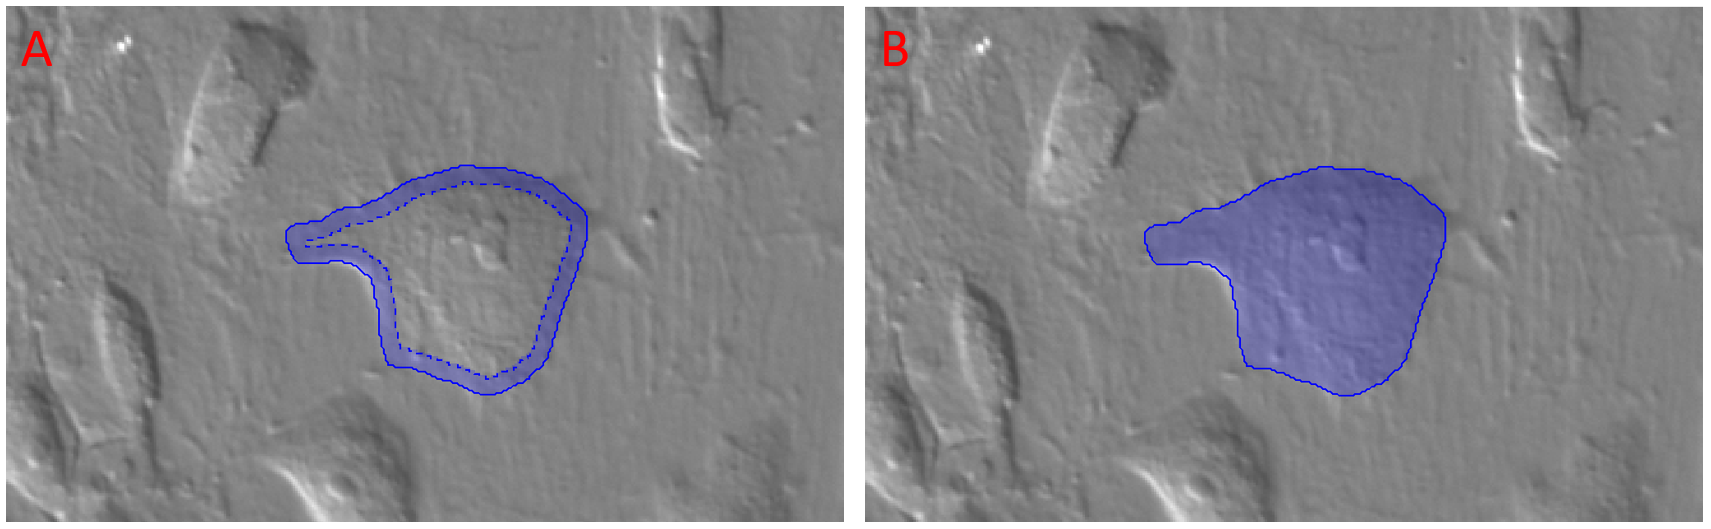
Figure illustrating the effect of the measurement option fill holes. Panel A shows an area brushed with fill holes set to off. Panel B shows the same area with fill holes set to on.
The brush tool can operate in several modes according to the selections you make in the brush drop down menu.
Select ‘Enable Merge and Edit’ to activate the ‘Overlapping’ brush tool. In this mode any new measurements that touch or overlap existing measurements will merge with them as a single measurement.
De-select ‘Enable Merge and Edit’ to active the ‘Masked’ Brush tool. In this mode any new measurements that touch or overlap existing validated measurements remain separate from them, any areas of overlap remain part of the original measurement.
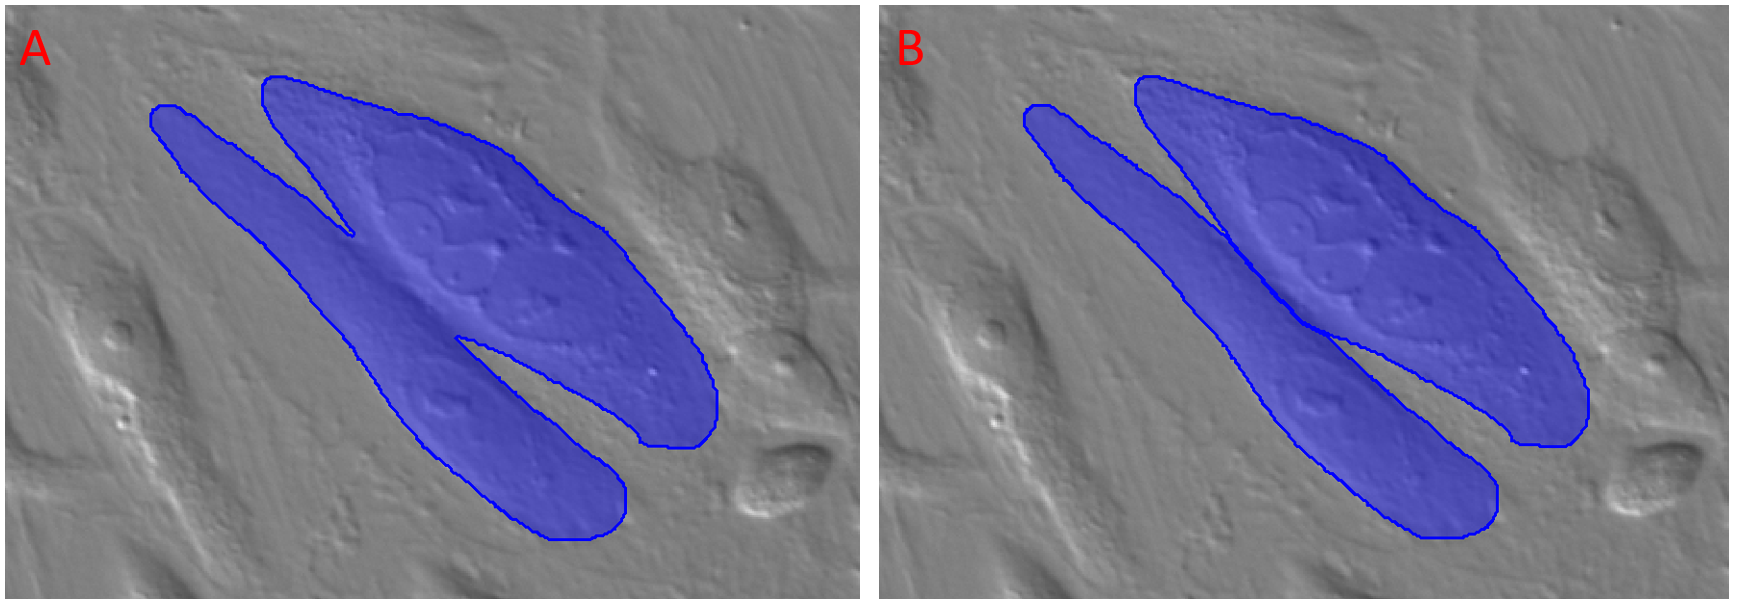
Figure illustrating the behaviors of the overlapping and masked brush tools. Panel A shows the behavior of the overlapping brush tool - overlapping or touching measurements are merged as a single measurement. Panel B shows the behavior of the masked brush tool - measurements that touch or overlap remain separate.
Enable ‘Allow Overlapping Classes’ to allow objects in different classes to overlap. This option is only available for the ‘Masked’ brush tool. With this option selected objects of different classes can overlap, objects within the same class continue to remain separate.
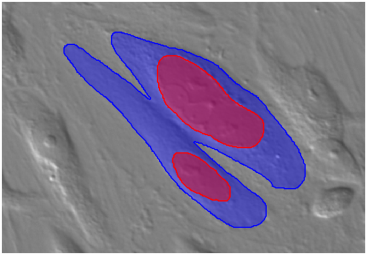
Figure illustrating the behavior of the Masked brush tool with Allow Overlapping classes enabled. Measurements in the Red Class can overlap measurements in the Blue class.
There are several shortcuts that make using the brush tool easy:
-
Control + Mousewheel – Change the size of the Brush.
-
‘S’ – Change the Brush Shape.
-
Shift + Left Mouse Click – Change the tool to an Eraser.
-
Backspace – Undo the last brush or eraser action.
-
Shift + Backspace – Redo an Undo.
-
Enter or Double-Click – Validate a brushed measurement.
-
Esc – Delete any unvalidated changes.
-
Double middle click - delete a validated measurement that is beneath the tool (Masked Brush only).
-
Control ‘Z’ – Undo a Delete.
Eraser
The eraser tool can be used to erase measurements or parts of measurements ‘freehand’.
Select the eraser tool (the cursor updates to show that the eraser tool is selected), left mouse click to activate the eraser and freely erase measurements on the image.
There are several shortcuts that make using the eraser tool easy:
-
Shift – Turn the eraser into a brush.
-
Backspace – Undo the last erase action.
-
Shift + Backspace – Redo an undo.
-
Ctrl + Mouse Wheel – change the size of the eraser.
-
‘S’ – Change the eraser shape.
-
Enter or Double Click – Validate the changes.
-
Esc – Cancel all changes.