Compare
Image-Pro with Capture Module Only
This group has two tools:
Image Compare
Use the Image Compare tool to compare live images to previously acquired images. Click here for more information.
Overlay
Use the
A crosshair overlay is added if the Crosshair checkbox is selected in the Overlay drop-down menu (circled in green below); the Live Overlay is added if the Live Overlay checkbox is selected in the Overlay drop-down menu (circled in blue below).
Click here for a complete description of all the controls on the Overlay drop-down menu.
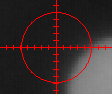
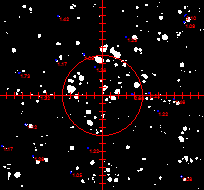
Crosshair Overlay
Crosshair overlays are a special configuration of standardized lines that are superimposed on the image to provide spatial orientation. The classic crosshair form is two fine lines, one vertical and one horizontal, that intersect in the middle of the image.
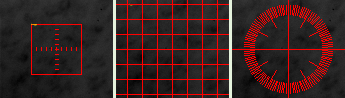
But you can also use this tool to place boxes, grids, and protractors:
Live Overlay
The Live Overlay is the set of custom overlay items that you have tagged as live overlay items through the Features Manager. The content of the Live Overlay is entirely up to you. It can be any collection of ROIs, Annotations, or Measurements that you routinely apply to images and that you want to be able to, with a single click of the Overlay tool, add to new images.
Overlay Drop-Down Menu
Click on the Overlay down arrow to show a submenu of options. This submenu includes the following overlay options.
Crosshair:
- Type: From this list box, select the type of crosshair to display.
- Color: Click on this tool to reveal the color picker dialog. The color you select here will be used for the crosshair overlay lines and tick marks.
- Width: Use this spin box to specify the desired line thickness, in pixels, for the crosshair overlay.
- Labels: Check/uncheck this box to show/hide the labels that show the values that correspond to the crosshair tick marks. If a spatial calibration is assigned to the image, the label values represent distances in the units of that calibration definition. Otherwise, the label values are in pixels.
- Labels Color: Click on this tool to reveal the color picker dialog. The color you select here will be used for the label text
- Circle: Check/uncheck
this box to show/hide a center circle when the traditional crosshair pattern
is selected for Type.
- Offset X, Offset Y: By default, the crosshair overlay is place at the center of the image, but you can click and drag it to any part of the image, if desired. Use the Offset X and Offset Y controls to adjust the crosshairs overlay left, right, up, or down. Use negative values to adjust the crosshairs left and up; use positive values to adjust the crosshairs right and down.
- Move: By default, the crosshair overlay is place at the center of the image, but you can click and drag it to any part of the image, if desired. Click on the Move Crosshair tool, and then click and drag the center of the crosshair overlay to the desired location. You can also use the Offset X and Offset Y controls for more precise adjustments.
- Burn In: When crosshairs are initially
placed on an image, they exist as graphical overlays and are not part
of the image. If
you want them to become part of the image, however, you can ‘burn’ them
into the image using the Burn-In
tool. The
Burn-In tool permanently embeds
the crosshairs into the image.
Live Overlay: Check/uncheck this box to show/hide the live overlay in the active image. NOTE: This option is only enabled if overlay items have been tagged for the live overlay through the Features Manager.
- Manage Live Overlay: Accesses the Features Manager panel through which you tag ROIs, Annotations, and/or measurements as belonging/not belonging to the live overlay.
Add on Preview: Check/uncheck this box to show/hide the crosshair overlay in the live preview window.