Process > Filters > 3D Filters
The 3D Filters tool allows you to access Image-Pro's set of 3-dimensional filters.
3D Filters can be applied to images to adjust (reduce or boost) the rate of brightness change in an image. If you are not familiar with the process and effects of filtering, read About Filters.
Image-Pro's 3D Filter set includes an extensive set of convolution and morphological filters. You can also create your own filtering kernels and apply them with the 3D Filters command.
When you select the 3D Filters tool, the 3DFilters tab dialog is opened. Each group of filters has its own tab, where you select the type and size filter you want to use. The selected filter will be applied to the active image. You may use the Undo command if you want to remove the effects of a filter you have applied.
Convolution Filters
Low-Pass: Select this filter if you want to soften an image by eliminating high-frequency information (this has the effect of blurring sharp edges). The Low-Pass filter replaces the center pixel with the mean value in its neighborhood. The Low-Pass filter can also be used to remove noise.
High-Pass: Select this filter if you want to enhance high-frequency information. The High-Pass filter replaces the center pixel with a convolved value that significantly increases its contrast from its neighbors. The High-Pass filter leaves only elements of high contrast.
Gaussian: Use this filter to soften an image by eliminating high-frequency information using a Gauss function. This has the effect of blurring sharp edges. The operation of the Gauss filter is similar to the Low-Pass filter, but it degrades the image less than the Low-Pass filter.
High-Gaussian: Use this filter when you want to enhance fine details. Its operation is similar to the unsharp masking technique but it introduces less noise in the process. It uses a Gaussian curve type of kernel. Available in 7x7 and 9x9 kernel sizes.
Edge Plus: Use this filter to extract and enhance positive edges, with bright features on a dark background.
Edge Minus: Use this filter to extract and enhance negative edges, with dark features on a bright background.
Median: Select this filter if you want to remove impulse noise from an image. The Median filter replaces the center pixel with the median value in its neighborhood. It will also blur the image.
Rank: Select this filter to remove impulse noise from an image. The pixels in the kernel are ranked by order of intensity, and the pixel in that range at the Rank percentage is chosen for comparison. For example, in a 5x5 kernel, there are 25 pixels. A rank percentage of 95% would choose the second-brightest pixel for comparison. If the differences between the selected pixel and the center pixel is greater than the threshold value, the Rank filter replaces the center pixel with the selected pixel.
- Width, Height, and Depth define
filter size along X, Y and Z axes correspondingly. The sizes can only
be odd numbers from 1 to 999. Width,
Height, and
Depth can also be linked checking
the
 button, so adjusting
one will also change the values of the
others.
button, so adjusting
one will also change the values of the
others.
- Passes: Enter the number of times you want the filter applied to your image. When a filter is applied multiple times, its effect is amplified by each pass. An image that has been softened by one pass of the Low Pass filter, will be softened further by a second pass.
- Strength: Enter a value from 1 - 100 that reflects how much of the filtering effect you want applied to the image. A value of 100 specifies that you want the full strength (100%) of the filtered result applied to each pixel. Values less than 100 cut the full weight of the filter - a value of 10 indicates that only 10% of the difference between the filtered pixel value and the original pixel value should be applied, a value of 20 indicates that 20% of the difference should be applied, and so forth.
- Rank (%): This value specifies which pixel in the sorted array will be used to replace the center pixel. Pixels in the array will be sorted in ascending order. Pixel index 0 corresponds to the lowest pixel value. A 50% Rank means the middle of the array. 0% rank means the lowest index (lowest gray value), and 100% rank means the highest index (highest gray value).
Morphological Filters
Open: Select this morphological filter if you want to modify the shape of objects in your image. Assuming your image contains bright objects on a dark field, the Open filter will smooth object contours, separate narrowly connected objects, and remove small dark holes.
Close: Select this morphological filter if you want to modify the shape of objects in your image. Assuming your image contains bright objects on a dark field, the Close filter will fill gaps and enlarge protrusions to connect objects that are close together.
Erode: Select this morphological filter if you want to modify the size of objects in your image. The Erode filter erodes the edges of bright objects and enlarges dark ones.
Dilate: Select this morphological filter if you want to modify the size of objects in your image. The Dilation filter dilates bright objects and erodes dark ones.
Distance Map: This filter creates a distance map of the current sequence. The distance map is created as a new floating point image, where the amplitude of every pixel corresponds to the shortest Euclidean distance to the edge of a binary object. The binarization is based on the Threshold value, which is defined in percentage of the maximum pixel value of the image class. For floating point images, the minimum and maximum are defined by the dynamic range.
Watershed: Select this filter to separate objects that are touching. The Watershed filter erodes objects until they disappear, then dilates them again, but will not allow them to touch. The Watershed filter uses the distance map of the binarized image to determine the separation of objects. There are several options associated with the Watershed filter:
- Threshold %: Enter a percentage value from 1 - 100 that specifies the intensity value you want Image-Pro to use for binarizing the image. For example, a Threshold of 50% on a Gray Scale image would set all values from 127 to 0 (black) and all values greater than or equal to 128 to the maximum value for that image class (white).
- Threshold (level): This is the same as Threshold %, but it allows you to specify the threshold as an absolute grayscale value.
- Erosions:
If
the Auto option is unchecked,
the distance map is limited to the Erosions value. This option can be used to separate only slightly
touching objects, avoiding separation of large objects.
Gray Watershed: Like the Watershed filter, this filter is useful for identifying the separation between objects. Whereas the Watershed tool uses the distance map of the binarized image, the Gray Watershed filter uses the gray levels of the objects on the original image. There is only one option associated with this filter:
The Preflood Level is in gray levels. The points of local maxima are filled until their basins meet, creating a watershed separating line.
Thinning: Select this filter to reduce an image to its skeleton.The thinning is based on the distance map of the volume and produces a 26-connected medial axis of the objects above the Threshold. If the Passes option is on the pixels farther than the iterations distance from the object’s edge are not skeletonized.
There options associated with this filter are further described below:
- Threshold (%): Enter a percentage value from 1 - 100 that specifies the intensity value you want Image-Pro to use for binarizing the image. For example, a Threshold of 50% on a Gray Scale image would set all values £ 127 to 0 (black) and all values ³ 128 to the maximum value for that image class (white).
- Threshold (level): This is the same as Threshold %, but it allows you to specify the threshold as an absolute grayscale value.
- Passes: If the Auto
checkbox is checked, Image-Pro
will continue to iterate until the image has been completely “thinned”
or “pruned.” If
it is not checked, Image-Pro
iterates as many times as you specify in the spin box below the Auto checkbox. Depending
on the filter, successive iterations will strengthen the effect of the
filter. Bear in mind that successive passes also require additional
time for execution.
Pruning: Select this filter to eliminate projecting arms from a skeleton input image. The number of iterations defines the branch length to be deleted. If the Preserve Long Branches option is checked, branches longer than the number of iterations will not be pruned. The following images show the source image and the image resulting from three passes of the Pruning filter.
There are several options associated with this filter:
- Threshold (%): Enter a percentage value from 1 - 100 that specifies the intensity value you want Image-Pro to use for binarizing the image. For example, a Threshold of 50% on a Gray Scale image would set all values £ 127 to 0 (black) and all values ³ 128 to the maximum value for that image class (white).
- Threshold (level): This is the same as Threshold %, but it allows you to specify the threshold as an absolute grayscale value.
- Passes: If the Auto checkbox is checked, Image-Pro will continue to iterate until the image has been completely “thinned” or “pruned.” If it is not checked, Image-Pro iterates as many times as you specify in the spin box below the Auto checkbox. Depending on the filter, successive iterations will strengthen the effect of the filter. Bear in mind that successive passes also require additional time for execution.
- Retain Long Branches: This option is only relevant to Pruning. If selected, branches longer than the number of iterations will be retained; branches shorter than the number of iterations will be deleted (i.e., "pruned"). Use this option to extract the stem of the skeleton.
Reduce: Select this filter to reduce the objects in an image to a single point or group of points. The filter is based on the thinning filter and if the object has holes, the output will be a ring.
Branch/Endpoints: Use this filter to identify morphological branches and endpoints in a skeleton image. There are several options associated with this filter:
The check-boxes: Skeleton, End points, Triple branches, and 4+ Branches define the morphological elements to be included into the output image. The gray level of the output points is defined by the type of element according to the following table:
Single point
10
End points 20
Skeleton 30
Triple branches 40
4+ Branches
50 and above
- Threshold %: Enter a percentage value from 1 - 100 that specifies the intensity value you want Image-Pro to use for binarizing the image. For example, a Threshold of 50% on a Gray Scale image would set all values from 127 to 0 (black) and all values greater than or equal to 128 to the maximum value for that image class (white).
- Threshold
(level): This is the same as Threshold %, but it allows you to
specify the threshold as an absolute grayscale value.
Top Hat Plus: Extracts bright objects on a dark background. It is equal to the difference of the input and a grey-scale opening.
Top Hat Minus: Extracts dark objects on a bright background. It is equal to the difference of a grey-scale closing and the input.
Ring Top Hat: Extracts pixels that are brighter than the pixels in the ring neighborhood. It is equal to the difference of the input and a grey-scale dilation with a ring kernel.
Gradient: Morphological gradient. It is equal to the difference of a grey-scale dilation and a grey-scale erosion.
Local Maximum: Locates pixels with maximum intensity in the filter neighborhood. Extreme pixels are preserved, other pixels are replaced with minimum image value.
Local Minimum: Locates pixels with minimum intensity in the filter neighborhood. Extreme pixels are preserved, other pixels are replaced with maximum image value.
Kernels
The Kernels tab allows you to use kernels that are defined in files located in the Image-Pro \Kernels\Morphological and \Kernels\Convolution folders of the Image-Pro installation directory. This option allows you to make custom filters. The available list of file filters appears in the Kernels pull-down list box.
A kernels file is a simple text file that has the following format:
- Name: Indicates the name of the kernel as it should appear in the pull-down list box.
- Size: Indicates the size of the kernel. For example, the kernel could be set to a 3 x 3 x 3 cube. Thus, in the Kern section, there are three 3 x 3 kernels defined -- one for each of the "z" planes (0, 1, and 2). The coefficients for each 3 x 3 kernel are defined in columns 0, 1, and 2. The coefficients tell Image-Pro what value is to be multiplied with each pixel that will be taken into account by the filter kernel. A value of zero tells Image-Pro to ignore the pixel.
- Offset: The pixel whose value is being changed is usually the center-most pixel. You may, however, designate any pixel you want.
- Boost: Enter here the constant value to be added to the result after the value of the modification has been calculated.
-
FilterType: Should be zero if the filter is a Convolution filter. Should be one if the filter is a Morphological filter.
Defining the Matrix
The matrix at the bottom of the text block specifies the coefficients to be applied to each pixel in the 3D matrix.
- KernN: This column specifies the number of the kernel being defined. This should always be one if Kernels is set to one.
- Z: The values in this column specify the Z plane to which the other values in the corresponding row apply. The Z values are zero-based, so a value of zero indicates that the row applies to the top-most plane in the stack.
- y/x: The values in this column specify the row number within the specified Z plane. This value is zero-based, so a value of zero indicates that the row applies to the first (top-most) row of pixels on the specified plane.
-
0,1,2...: These columns specify the coefficients for each pixel in each row for each Z plane. The number of columns should match the second number in the size specification. For example, if the Size specification is 3x2x5, there should be 2 columns. This value is zero-based, so column zero defines the left-most pixel in each row.
Guidelines:
When specifying coefficients for each pixel in columns 0, 1, 2, etc., follow these guidelines. A value of 0 (zero) tells Image-Pro to ignore the pixel. A positive value indicates a positive weighting to give the pixel in the calculations. For example, a value of one tells Image-Pro to count that pixel’s value once in the average; a value of two tells Image-Pro to count that pixel twice in the average, and so on. Likewise, a negative value indicates a negative weighting to give the pixel in the average. For example, a value of –2 tells Image-Pro to discount that pixel’s value twice in the average. For a more detailed discussion of how kernels are processed for both Convolution and Morphological filters, read About Filters.
Convolution/Morphological: Click on one of these radio buttons to populate the Kernels pull-down list box with the desired set of file filters. If you select Convolution, the Kernels pull-down list box is populated with all the file filters located in the \Kernels\Convolution folder. If you select Morphological, the Kernels pull-down list box is populated with all the file filters located in the \Kernels\Morphological folder.
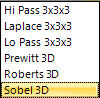
The following kernel files are pre-installed:
- Morphological
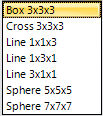
- Convolution