HDR
The HDR feature allows you to create a single High Dynamic Range image out of a sequence of images that capture different exposures of the same scene. When you click on the HDR icon, Image-Pro captures a sequence of images at different exposures, according to your options, and combines them into a single High Dynamic Range image. The resulting image is a compilation of the sequence of images that, based on your settings, presents the image data using the widest possible range of dark to light pixels. This wider dynamic range allows HDR images to more accurately represent the wide range of intensity levels found in real scenes.
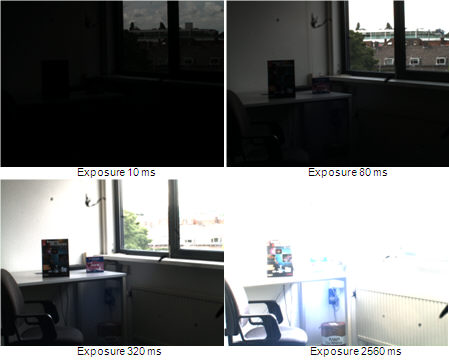
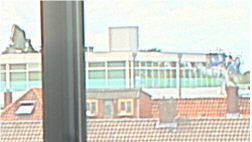
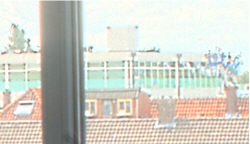
For example, consider the following set of images of the same scene captured with different exposure times.
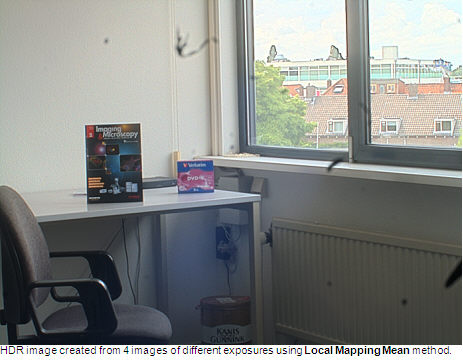
The calculated High Dynamic Range image created from these different images looks as follows:
The HDR feature captures a sequence of images from Live Preview window based on the settings you specify. Click the down-arrow of the HDR tool to show the following options:
Start: Click this option to initiate the capture sequence based on your selections and settings.
Use Live Preview for Exp Time: This option is available if you select any other option in the Set Exposure Time Method list box other than "Automatic". If selected, Image-Pro prompts you to set the exposure manually, allowing you to preview the result on the Live Preview, prior to capturing HDR images.
Set Exposure Time Method: From this pull-down list box, select the method you want Image-Pro to use to sequence the collection of HDR images.
- Low and High: If you selected this option, then Image-Pro prompts you to set the exposure to the desired low exposure setting and, after it captures that image, it prompts you to set the exposure to the desired high exposure setting. The resulting HDR image is calculated from these two image captures (ignoring the settings for Num images and Ex Time Factor).
- High: If you select this option, then Image-Pro prompts you to set the exposure to the desired high exposure setting. It then captures the number of images specified in the Num Images spin box, decrementing the exposure after each capture according to the Exp Time Factor setting. The resulting HDR image is calculated from the set of captured images.
- Low: If you select this option, then Image-Pro prompts you to set the exposure to the desired low exposure setting. It then captures the number of images specified in the Num Images spin box, incrementing the exposure after each capture according to the Exp Time Factor setting. The resulting HDR image is calculated from the set of captured images
- Middle: If you select this option, then Image-Pro prompts you to set the exposure to the desired middle exposure setting. It then captures half the number of images specified in the Num Images spin box, decrementing the exposure after each capture according to the Exp Time Factor setting. It then captures the other half of the number of images specified in the Num Images spin box, starting at the middle exposure setting and incrementing the exposure after each capture according to the Exp Time Factor setting. The resulting HDR image is calculated from the set of captured images.
- Automatic: Select this option to have Image-Pro auto-detect appropriate exposure levels, capture a sequence of frames, and automatically calculate the HDR image from them.
Advanced
Click on the "Advanced" option of the HDR options menu to show the various controls available for tuning the HDR feature to achieve your ideal high dynamic range image.
Method: Several methods are available for generating HDR images. They are:
- HDR
Merge. This
option creates an HDR image by merging the selected frames. The
output image is a floating point type with extended dynamic range. No
tone mapping is applied.
- Global
Tone Mapping: With this option, global tone mapping is applied
to the output image, compressing the HDR image display range to achieve
a Low Dynamic Range (LDR) image. The
output Image has the same type as the input images.
Global tone mapping, dynamic range compression is applied, but no sharpening.
- Local
Mapping Mean: This
option uses local tone mapping based on local mean value of the pixel
neighborhood. It
increases the contrast of small details. The
output image has the same type as the input images.
Local tone mapping Mean - note that the small details are much more contrast.
- Local
Mapping Median: This
option uses local tone mapping based on the local median value of the
pixel neighborhood. Like
the Local Mapping Mean option, it increases the contrast of small details.
This option
does not produce halos as can happen in case of the Local Mapping Mean
option, however, it takes more computer resources to do. The
output image has the same type as the input images.
Local tone mapping Median - small details have higher contrast, but don't have halos around the edges.
Key Value: This
is the key value of the tone mapping algorithm. The
key value controls tone mapping and affects the brightness distribution
of the resulting image. The
choice of key value has an effect on bridging the gap between the two
ends of the luminance values. A
lower key value will help in boosting up the luminance values in the darker
parts of the captured scene. A
reasonable choice for Key Value is a value between the range 0.15-0.5.
The default is 0.25.
Saturation: This spin box controls the overall gain applied to every pixel of the output image. A value of "1" applies no gain. Values greater than 1 increase the overall brightness of the output image. Values less than 1 decrease the overall brightness of the output image.
Filter Size: This spin box defines the kernel size of the filter used to do local tone mapping. Enter a value of 1 to 100.
Strength: This spin box controls the local contrast determination of the local mapping algorithm. Enter a value of 1 to 100. A higher value achieves a higher local contrast; a lower value achieves a lower local contrast.