Rotate
The Rotate tool can be found on the Geometry group on the Adjust tab's ribbon. Click on the down arrow below the Rotate tool to reveal the rotate options. The Rotate options are described below.
Rotate 90° CW: Use this command to turn the image in the application area to an angle 90 degree to the right.
Rotate 90° CCW: Image-Pro turns the image in the application area to an angle 90 degree to the left.
Flip Left-Right: This command reverses the image in the application area, so that the top right corner of the original image is now the top left, and the top left corner of the original image is now the top right corner.
Flip Top-Bottom: On using this command, Image-Pro reverses the position of the image in the application area, so that the top right corner of the original image is now the bottom right corner, and the top left corner of the original image is now the bottom left corner.
Rotate 180°:Rotating to 180 degrees creates a mirror image of the original image in the application area, so that the top right corner of the original image becomes the bottom left corner, and the top left corner of the original image is now the bottom right corner.
Swap Lower Left-Upper Right: This option produces a mirror image that is also rotated 90 degrees.
Custom: The custom rotation options allow you to rotate an image or ROI to a specific degree of rotation.
Enter the desired degrees of rotation in the Angle spin box. It can hold a maximum and minimum value of 180 and –180 degrees respectively.
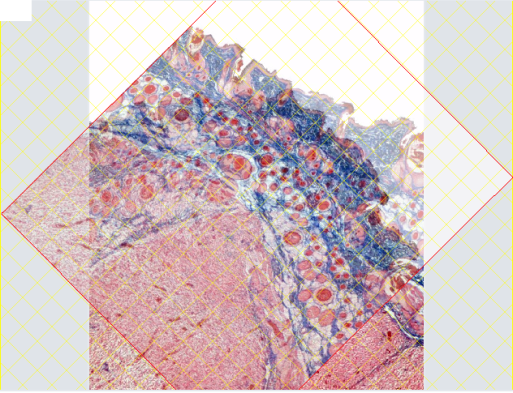
When Preview is selected, a preview of the rotated image is overlaid on the original image. This allows you to preview the rotation of the image at the angle you specified so that you can adjust the Angle value, if necessary. When Ref Grid is selected, an overlay of grid lines is displayed on the image. It is rotated according to the value entered in the spin box to the right of the Ref Grid option. You can adjust the rotation of the grid as needed by increasing or decreasing the value in the Ref Grid spin box. These grid lines can give you something to align features in the image to in order to effect an optimal rotation of the image.
For Example: The following image has been given a rotation of 45 degrees and the Preview and Ref Grid checkboxes are selected.
When the preview is displayed, you can also click and drag it to the desired degrees of rotation. Once you have identified the target degrees of rotation, click on one of the Rotate buttons:
Trim: Click this option to have the resulting rotated image trimmed to the canvas size of the original image.If this option is not selected, the rotated image is placed on a canvas large enough to contain the entire image after rotation.
Rotate: This button executes the rotation using the currently defined custom degrees of rotation.