Slicer
The Slicer feature provides the option to view and examine a Z-stack image sequence using volume cross-sections in XY,YZ and XZ planes. When you select the Slicer tool, the Slicer view of the currently active image is displayed in the application workspace.
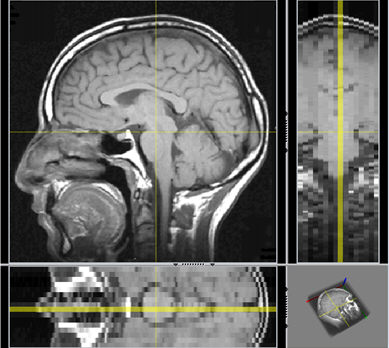
The top-left view pane shows the XY plane, the top-right pane shows the ZY plane, and the bottom-left pane shows the XZ plane. The bottom-right pane shows the 3D View of the Z-stack. This pane's display will be configured according to the controls on the 3D View ribbon bar.
The size of the panes can be controlled using the splitter dividers.
To resize a pane, click and drag its splitter to the desired location. Click on the splitter to close or open the corresponded pane.
The Slicer feature has its own ribbon bar with controls for positioning, sizing, and adjusting the view. The various controls of the Slicer feature are described below:
Max/Min: These options are mutually exclusive. Choose Max to render the Z-stack using maximum intensity projection. Use Min to render the Z-stack using minimum intensity projection.
Cross: Check/uncheck this box to show/hide the cross-section cursor.
Color Picker: Use this color picker tool to select the color to be used for the cross-section cursor.
Reset: Click this button to reset all values of the Slicer ribbon bar to their factory default values.
Duplicate: This button duplicates the active view in a new window as a new file.
Voxel Size: The Voxel Size group defines the size of the voxel -- the volumetric equivalent of a pixel. Note, that X and Y size are defined by the spatial calibration of the image and the Z size is calculated from the distance between frames in the Z direction. Only Z size is editable. This value will define the size of slices in the Z direction.
Slicer Position: Use these sliders to set the XYZ coordinates of the cross-section.
Thickness: Clicking the All button sets the thickness to the volume dimensions. This button can be used to create Maximum intensity projections of the whole volume. Clicking the Thin button sets the thickness to 1.