Process > Combine > Align
The Align tool in the
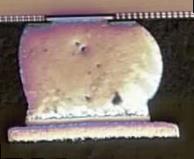
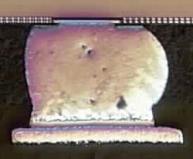
For example, suppose you wanted to average two images of the same feature, but the images registered some camera movement between snaps:
When superimposed, they do not line up (they are not aligned), so averaging them as they are produces this image:

The provisions of the Align tool are designed to make it easy to bring images such as these into alignment. And if you have a sequence file with a more substantial number of frames that you want to align, the Align tool can act upon the entire sequence to align its various frames.
To perform an Alignment operation, you can provide either a single image sequence file, or you can provide a set of individual image files, or a combination of both.
Click the Align tool's down arrow to show the Align drop-down menu. The three options of the Align pull-down menu are described below.
Align: This tool opens the Align dialog box and adds the currently active image or image sequence, and any images/sequences selected in the Quick Start Guide: Using the Images Panel, to the Selected Images panel of the Align dialog box.
Tip: If you are providing a single sequence file, simply open it into the application workspace before clicking on this tool. Optionally, you can also open multiple individual images and select them all in the Images Panel by holding the <Ctrl> key down as you click on their thumbnail image. If you do this prior to clicking on the EDF option, they will all be added to the EDF dialog box's "Selected Images" panel.
At this point, you can review the options available on the Align dialog box to 'tune' the alignment function, make any modifications as needed, and click the Apply button on the Align dialog box to perform the alignment operation. Click here for more information about the controls available on the Align dialog box.
Align Selected: Click this tool to instantly perform an alignment operation on the currently active sequence file or on the currently selected set of images in the Images Panel. When you click this option, Image-Pro performs the alignment operation according to alignment options (i.e., on the Align dialog box) that were last used. Note that when you click on the Align Selected tool, whatever settings are currently set for the Align tool will be applied, whether or not the Align dialog box is displayed. If, by clicking the Align Image tool you do not obtain the alignment results you require, then adjust the controls on the Align dialog box, and try again.
Note: This tool is only enabled if the current image is a sequence file, or if multiple images are selected in the Images Panel. You can select multiple images in the Images Panel by holding the <Ctrl> key down as you click on their thumbnail image.
Set Selected to Align: This tool functions exactly the same as the Align tool described above.
The Align Dialog Box
When you click on the Align tool or its Set selected to Align menu option, the Align dialog box is displayed. The align dialog box has an area at the top -- the Selected Images list box -- where you can add the images you want to align. Remember, you must add as least two images, one to be the reference image to which the other image will be aligned.
To use this dialog box:
-
Use the following tools to identify the images you want to align.
-
Add: Click this tool to add the currently-active image in the Image-Pro workspace to the list of selected images.
-
Add All: Click this tool to add all currently-opened images in the Image-Pro workspace to the list of selected images.
-
Remove: Click this tool to remove the image currently highlighted in the Selected Images list box from the list box.
-
Clear: Click this tool to remove all images currently listed in the Selected Images list box from the list box.
-
-
Click on the Anchor tool and select the image that you want to be used as the reference image. If you align images using the FFT method (see step 3), then the image selected here is what Image-Pro will attempt to align the other images to.
-
Choose your alignment method from the Method list box. Image-Pro provides three options for alignment correction:
- FFT cross-correlation: Auto-align images by comparing them to the reference image you defined in step 2.
- User-defined shifts: Specify fixed X-plane and Y-plane pixel shifts, and apply them to the selected images.
- Manual alignment: Manually align images using shift, rotation, and scale tools.
-
Select or deselect the Trim tool.
If the alignment is purely translation, checking this box allows you to trim the output to include only those pixels that are valid in each image. Otherwise the output image is the same size as the input images, and empty pixels are filled with black.
-
Click Apply.
When you click Apply, Image-Pro applies the alignment corrections to the frames and/or images listed in the Selected Images list box, according to your chosen alignment method and specifications. It then creates a single sequence file composed of them.