3D View > View Style
Image-Pro with 3D Module only
The View Style group contains controls that affect the appearance of volumes in the 3D Viewer. The controls of the View Style group are described below.
Interpolation: Interpolation activates the bilinear approximation between voxels. This has a 'smoothing' effect in the volume rendition. When you click on this tool, the following drop-down menu appears:
- Cubic Interpolation:This option, when selected, activates the cubic interpolation between voxels. This has a 'smoothing' effect in the volume rendition.
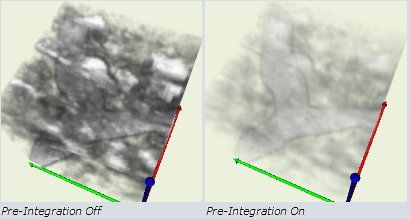
- Pre-Integrated: The Pre-Integrated option can be used to increase the quality of the volume view with a smaller number of slices. It is also useful when the transfer function has a lot of fast variations, i.e., the color changes very rapidly. The pre-integrated mode is available only for single channel volumes.
\
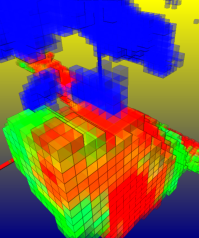
- Voxelize: The Voxelize option lets you visualize each non-transparent voxel by rendering each voxel as a cube of that voxel’s volume and intensity. It can be used to view volumes at the voxel level. The picture below shows a volume with the voxelize option on:
Boundary Opacity: Boundary Opacity increases or decrease the opacity of object edges, where gradients are high. Click on the down-arrow to the right of the Boundary Opacity tool to show the boundary opacity options.
When enabled, boundary detection (what is counted as a boundary) is based on the Threshold value, and how dark Image-Pro draws the boundaries is determined by the Intensity value. The higher the threshold, the fewer the pixels that get selected as 'boundary' pixels. The higher the intensity, the darker Image-Pro draws the boundaries it does detect. Note that using Boundary Opacity can significantly increase rendering time.
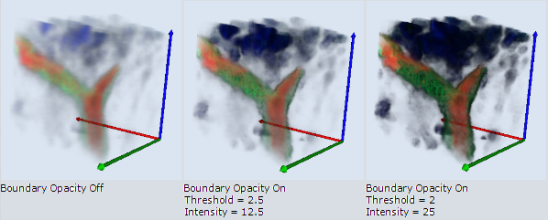
Note that using Boundary Opacity can significantly increase rendering time.
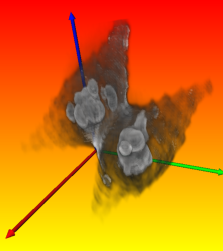
Edge Coloring: The Edge Coloring feature can be used to distinguish edges by color based on the gradient direction (normal). Edges where the normal direction (computed from the gradient) is facing the camera will have an unmodified color, whereas edges where the normal direction is more perpendicular to the view direction will tend towards the Edge Color. The Edge Color is whatever is selected through the Color Picker tool which can be accessed by clicking the down-arrow to the right of the Edge Coloring control.
In the example below, the coloring is on and the color is white:
Background Color: Use the Color Picker tool to select a background color for your volume display.
BackgroundOptions: The Background tool allows you to apply special background rendering to your volume display. When you click on this tool, the following menu is displayed:
- Gradient: When the Gradient option is selected, a color gradient is drawn as the background for the volume. The gradient transitions from the Background Color (described above) to the Gradient Color. The Gradient Color is the color you select for the Color control shown just below the Gradient option.
- Show Image: You can select this option to have Image-Pro load an image of your own to be displayed in (or as) the background for the volume display. The image might be a logo, for example, or it might be an image that you want to use to fill the entire background. From the Style list box, select where/how you want the image displayed in the background. Use the Browse control to navigate to the image file you want to use; selecting it through the Browse control automatically loads its path and filename into the File text box. The following image formats are supported: BMP.
Light: The Light tool activates directional light and volume lighting. The drop-down menu contains additional options related to light. These options only affect volumes displayed in Blended composition.
- Camera Light: Camera Light uses only the light from your camera.
- Directional Light: Directional light computes lighting based on the "surface" defined by the first non-transparent voxel instead of the gradient computed at every voxel. Deferred lighting is particularly valuable in situations when the volume does not contain well-defined surfaces. Deferred lighting may also achieve better results with a noisy volume.

- Edit Directional Light: Clicking this button activates the directional light editor. Note that this option is disabled when the Directional Light is off. Choosing this option displays the Light Direction Editor. Use the handle to manipulate the light direction. The Edit menu allows you to change the color using a color editor. The options are set to the default, always on top.
- Show Shadows: The Show Shadows option activates shadows on volume and scene elements. Note that when the light is off, the shadow is cast from the headlight, which follows the camera. When the light is on, the shadow is cast by the directional light, the position of which can be controlled using the Edit Light dialog.
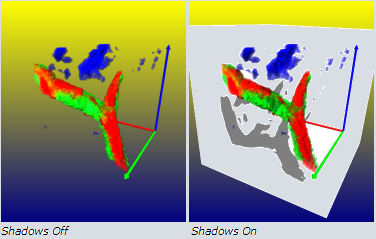
Shadow intensity and smoothness can be controlled using the corresponding controls. Intensity is given in range from 0 (no shadow) to 1 (dark shadow). Higher values of smoothness give smoother shadows.
- Shadow Screens: Shadow screen can be used to show dropped shadows Your can control the places where the shadow screens are shown (Y, Y, Z). You can also control the Shadow Screen Color and the offset. Offset is defined in percent of the volume size in the given direction. Shadow intensity and smoothness can be controlled using the corresponding controls. Intensity is given in range from 0 (no shadow) to 1 (dark shadow). Higher values of smoothness give smoother shadows.
- Shadow screen can be used to show dropped shadows. You can control the places where the shadow screens are shown (Y, Y, Z). You can also control the shadow screen color and the offset. Offset is defined in percent of the volume size in the given direction.
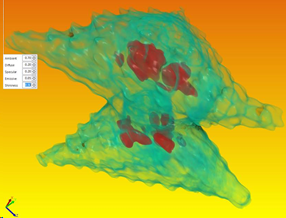
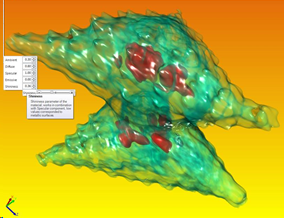
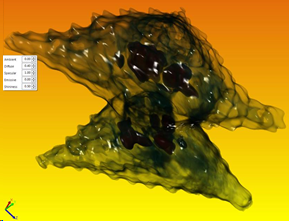
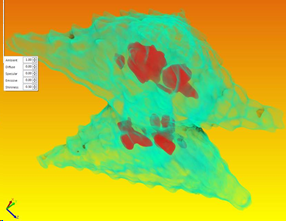
- Pseudo Surface: Pseudo Surface is a lighting effect that looks like a virtual surface created at the threshold level of volume opacity. It gives a better result when the volume data contain regional boundaries with relatively sharp gradients. The options in this group are described below.
Threshold: Threshold defines the opacity level for the Pseudo Surface in a range from 0 to 1. The default is 0.1.
Material: Material groups define the material properties of pseudo surface. The color of the surface is calculated from a combination of 4 color components, each component is in range from 0 to 1: Ambient, Diffuse, Specular, and Emmisive.
Ambient - the color of an object where it is in shadow. This color is what the object reflects when illuminated by ambient light rather than direct light.
Diffuse - represents direct light hitting a surface. The Diffuse Light contribution is dependent on the incident angle.
Specular - the white highlight reflection seen on smooth, shiny objects. Specular light is dependent on the direction of the light, the surface normal and the viewer location. Specular component makes the object look like metal or glass. The reflection property is also defined by Shininess, with values close to 1 the reflections will be very sharp as on polished metals, with lower values the radius of reflection increases to make it look as brushed metal.
Emissive - the self-illumination component of the color, has neon effect.
Here are some examples of the Pseudo Surface mode with different Material properties configurations: