Rotating an ROI
To rotate an ROI:
Click on the Select tool from the ROI toolbar.
Click on the ROI you want to rotate.
Multiple handles will appear around the perimeter of the image, and a single handle will appear in the center of the image.
Hover the mouse over the center handle to display the rotation cursor.
Click and drag the mouse to rotate the ROI.
Note that you can rotate the ROI with or without trimming and place it a new image. When the Trim box is checked, the rotated size of the ROI is the same size as the original ROI bounds, which usually requires trimming the rotated ROI.
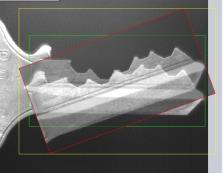
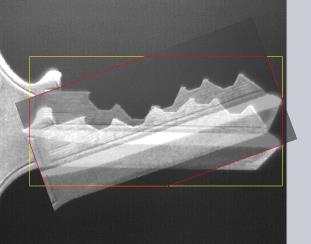
The below example shows a translucent preview of a -20 degree rotation with the Trim option unchecked. The green rectangle is the ROI to be rotated. The red rectangle shows the rotated ROI. The yellow rectangle shows the bounds of the new, rotated result image.
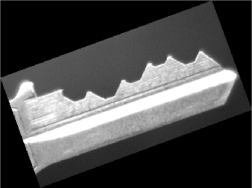
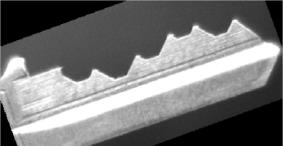
The rotated result is shown in the following image. Note that no part of the rotated ROI has been trimmed off, but as a consequence the new image is larger than the source ROI. Also note that areas outside the source ROI are shown as black in the new image.
The next example shows a translucent preview of the same -20 degree rotation with the Trim option checked. The green ROI rectangle is not visible here, because the yellow rectangle showing the bounds of the new image lies exactly on top of it (this would not be case if the ROI were a non-rectangle, as in the next example). The red, cut-off rectangle shows the rotated ROI with its trim.
The rotated result is in the following image. Note that part of the rotated ROI has been trimmed off in order to keep the new image the same size as the bounds of the source ROI.
Learn more about all features in The Select Tab